
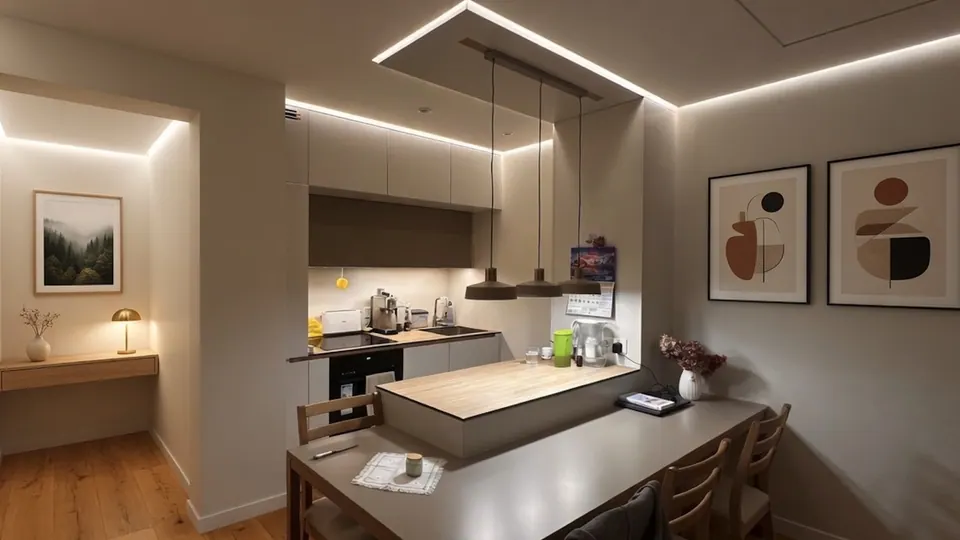
What is a shadow gap?
A shadow gap is a narrow, recessed reveal — commonly from about 6 mm up to 25 mm wide — between two surfaces, such as a wall and a ceiling or a wall and a floor. Instead of covering the junction with a skirting board or cornice, the surfaces are separated by a crisp line of shadow.
A shadow gap profile is the aluminium profile that forms that reveal. It is fixed before the plasterboard is finished and then plastered in flush, so the edge stays straight and well protected.
Where shadow gap profiles are used
- Ceilings
- A reveal between wall and ceiling makes the ceiling appear to float. Many ceiling profiles include an LED channel for indirect light.
- Floors
- A floor shadow gap profile replaces the skirting board: the wall stops just above the floor in a continuous shadow line.
- Walls and doors
- Concealed wall profiles create negative reveals, panel joints and flush door frames in plasterboard walls.
- Skirting
- Where skirting is still wanted, a slim aluminium skirting with concealed fixing keeps the line minimal.
- LED lighting
- LED-ready profiles turn the junction itself into the light source — continuous, without visible luminaires.
Shadow gap profile vs. traditional skirting and cornice
| Shadow gap profile | Traditional skirting / cornice | |
|---|---|---|
| Appearance | Flush, minimal line | Visible trim on the surface |
| Installation stage | Before finishing — plastered in | After finishing — applied on top |
| Integrated LED | Possible in LED-ready profiles | Rarely |
| Durability of the edge | Aluminium edge protects the plaster | Depends on trim material |
| Design intent | Architect-specified detail | Standard finish |
How a shadow gap profile is installed
- Plan the profile into the drawings and set-out — the reveal is part of the detail, not an afterthought.
- Fix the profile to the framing, substrate or board at the specified line and level, following the installation guide for that profile.
- Bed the perforated flange in jointing compound, cover it with reinforcing tape and skim flush with the board.
- Finish and paint the surface; a straight, well-fixed profile keeps the shadow line crisp.
- For LED profiles, plan driver and access positions in advance and insert the LED strip and diffuser after decoration. Electrical work must be done by a qualified electrician to local regulations.
Always follow the installation guide for the specific profile — partners and professionals receive it on request. Resources →
How to choose a shadow gap profile
- Surface
- Ceiling, wall, floor or skirting — each has its own profile family.
- Gap size
- From a slim 6 mm line to wider reveals; the gap defines how strong the shadow reads.
- Light
- Choose an LED-ready profile if the junction should also provide light.
- Finish
- Standard finishes vary by profile — typically mill, silver, black or white — and most aluminium profiles can be powder-coated in any RAL colour on request.
- Length
- Standard lengths of 2.5, 2.6 and 3.0 m.
Why distributors add the category
Shadow gap profiles are specified by architects, built by drywall and finishing contractors and requested by developers and homeowners. A distributor that carries the complete system — profiles, corners, end caps, LED diffusers and fixings — becomes the specialist source for the detail in its market.
Articles
- Floating ceiling with a shadow gap: how the detail is built
- Shadow gap profile vs skirting board
- LED shadow gap profiles: light, strip and diffuser
- Concealed doors and shadow gaps: walls without visible frames
- Shadow gap profiles in bathrooms
- Shadow gap profiles and plasterboard: choosing the right profile
- Choosing a finish: mill, silver, black, white or RAL
- Specifying shadow gap profiles in architectural drawings
- Installing shadow gap profiles: 10 common mistakes
- Case study: one apartment, every surface in one profile system
- How distributors add a shadow gap profile category
- Who buys shadow gap profiles — and why